Don't know a thing about Facebook Ads or how you can improve your social media marketing? Don’t worry – we’ve got you. Here, you’ll find a simple step-by-step guide on how to navigate the realm of Facebook Ads.
Step 1: Login to your account at business.facebook.com.
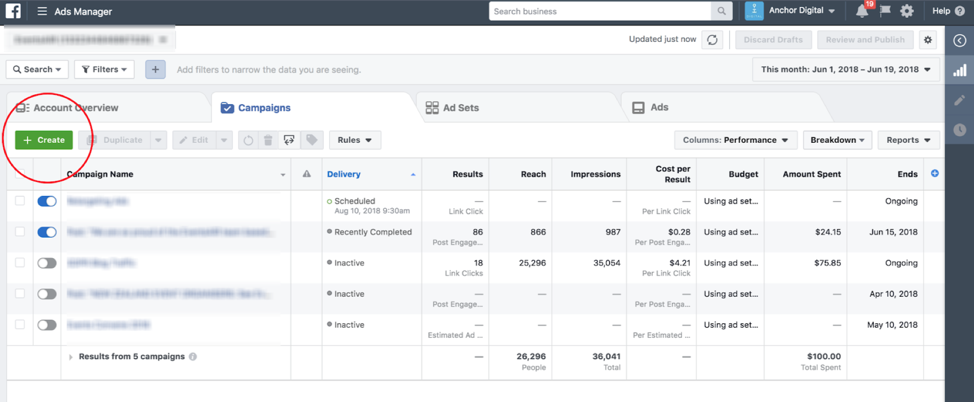
Step 2: Access your Ads Manager. Under Campaigns, click Create.
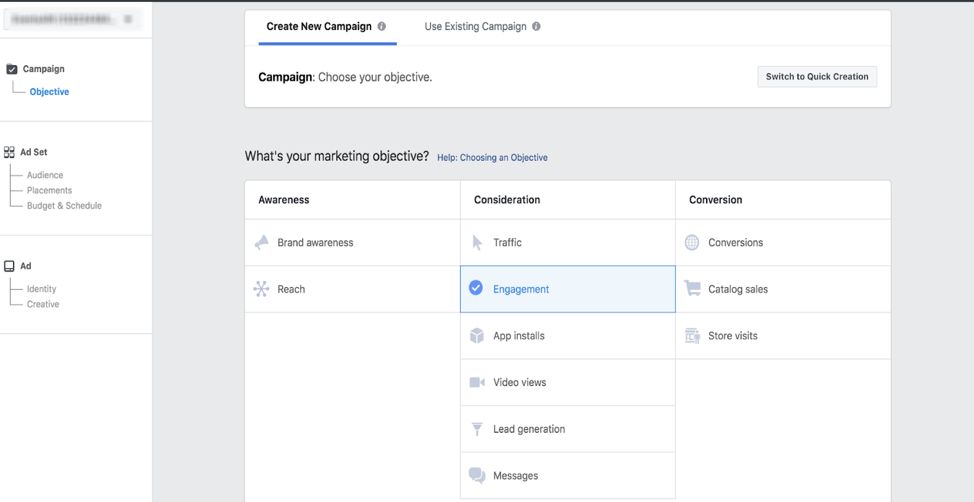
Step 3: Choose a type of Campaign.
Step 4: Choose a type of Ad.
This depends on what your goal of the ad/campaign is. For example, do you want people to click through to your website? Or do you want them to install your app? Based on what you select, Facebook will optimise how this ad is served to your audience.
Step 5: Name your Ad Set.
Step 6: Choose where you want traffic to be directed to.
This includes a website, your app or to Messenger among Facebook users.

Step 7: Define your Audience.This includes factors such as location, age, gender, language, interests and behaviours of the target audience you wish to reach out to. Changing these factors will affect the size of your audience potentially exposed to your ad.
You can target local audiences through four options provided by Facebook:
- Everyone in this location,
- People who live in this location,
- People recently in this location, or
- People travelling in this location
This information is based on the location in Facebook and Instagram profile data and mobile device. You can add up to 25 specific countries, up to 250 cities and 2,500 zip codes, among others. You can also choose to include only certain cities, or exclude certain locations, or just select worldwide. If you know the demographics of your top customers, create a saved audience to use in Facebook or Instagram. If you have created audiences before, it should be in the ‘Use a Saved Audience’ dropdown menu.

You can further segment your audience based on demographic (education, generation, etc.), interests (entertainment, hobbies and activities, etc.) or behaviours (digital activities, mobile device user, etc.), among others.
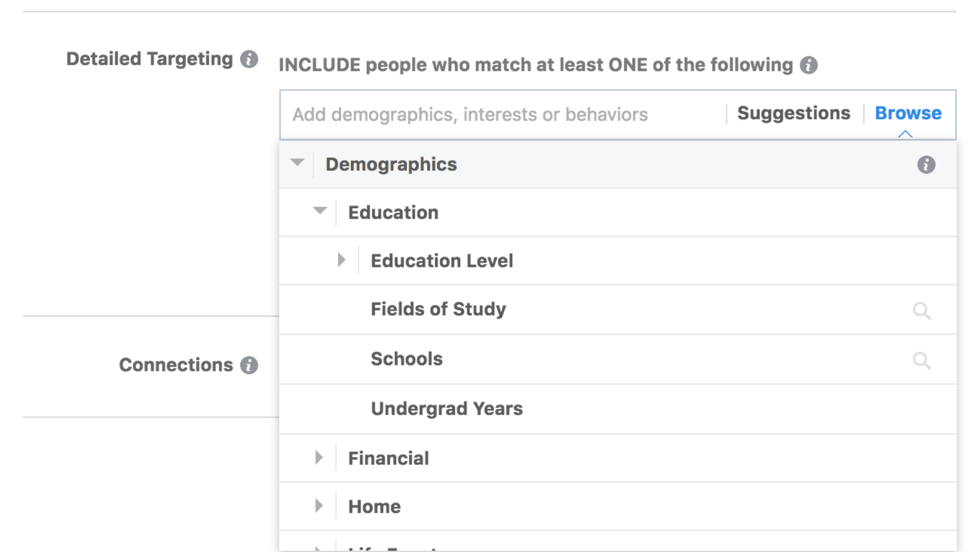
Based on your targeting parameters, Facebook will indicate in the Audience Size section how ‘specific’ or how ‘broad’ your audience selection is, and what your potential reach is. Facebook will also show you the Estimated Daily Results (Reach) based on a combination of your selected factors, past campaign data, market data and your allocated budget.

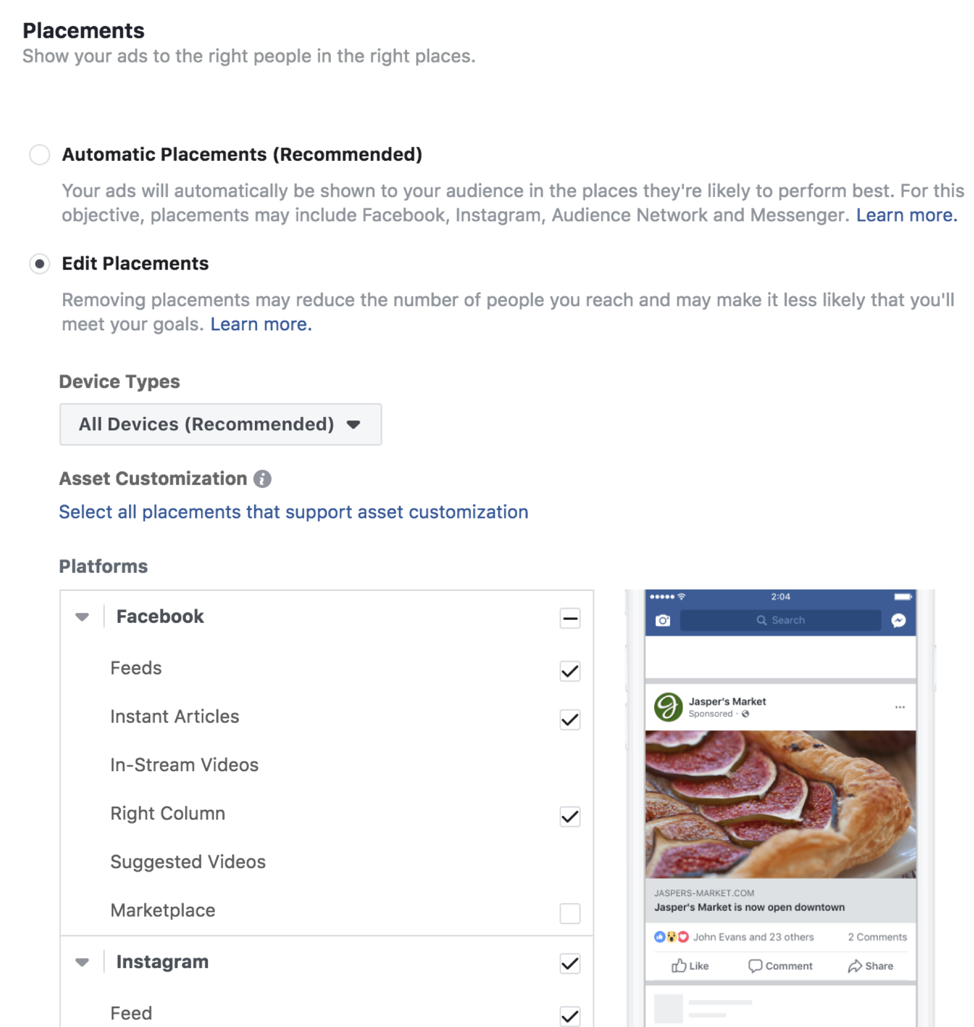
Step 8: Choose your Placements. Placements are where your ad will be displayed. Facebook offers three main options:
- Facebook,
- Instagram, and/or
- Messenger.
Within each platform, you can further choose where your ad will be displayed. For example, on Facebook, your ad can be placed on a Feed, Instant Articles, In-stream Videos, Right Column, Suggested Videos or Marketplace.
Step 9: Set your Budget & Schedule. You can choose to allocate a daily budget or a lifetime budget for your ad. Setting a daily budget cap means Facebook will spend this amount on delivering your ads daily. On the other hand, Facebook will calculate the average spend for each day if you choose to set a lifetime budget from a specific start to end date. It is better to start with a daily budget over an unlimited period first, and optimising your daily budget or pausing the ad based on the initial results.
You can schedule your ad to run continuously indefinitely, or set a start and end date.

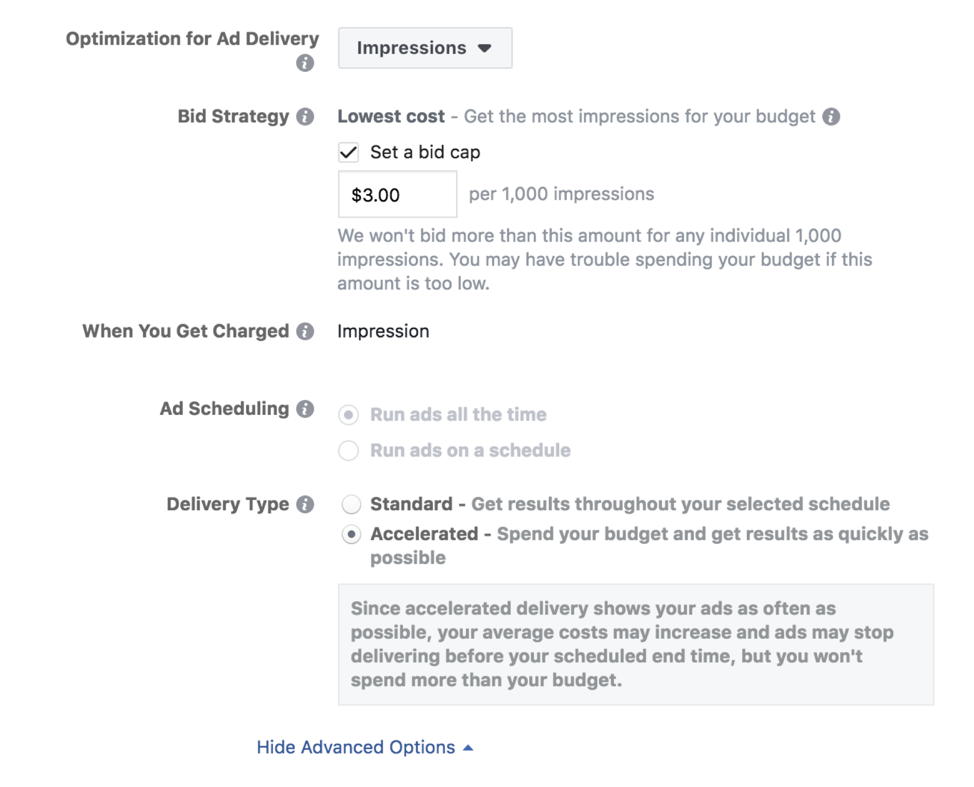
Click Show Advanced Options to optimise the delivery of your ad further based on:
- Optimisation for ad delivery (e.g. ‘impressions’ will deliver your ad to people as many times as possible),
- Bid strategy,
- When you get charged (based on optimisation for ad delivery),
- Ad scheduling, (all the time v. on a schedule), and
- Delivery type (accelerated ad delivery is more relevant to large advertisers with time-sensitive campaigns and your ad will be optimised for speed, not value)
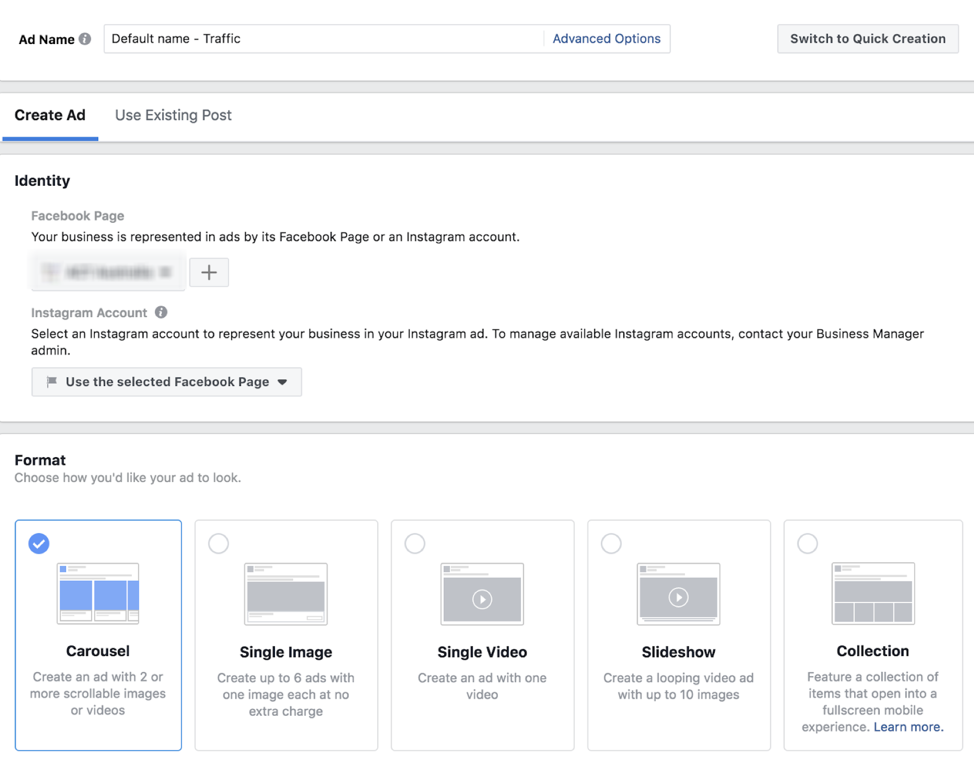
Step 10: Create your Ad. Use the default ad name, or rename your ad for enhanced organisation. Choose an ad format such as carousel, single image, single video, slideshow or collection.
Add text to give people a better understanding of what you are advertising.

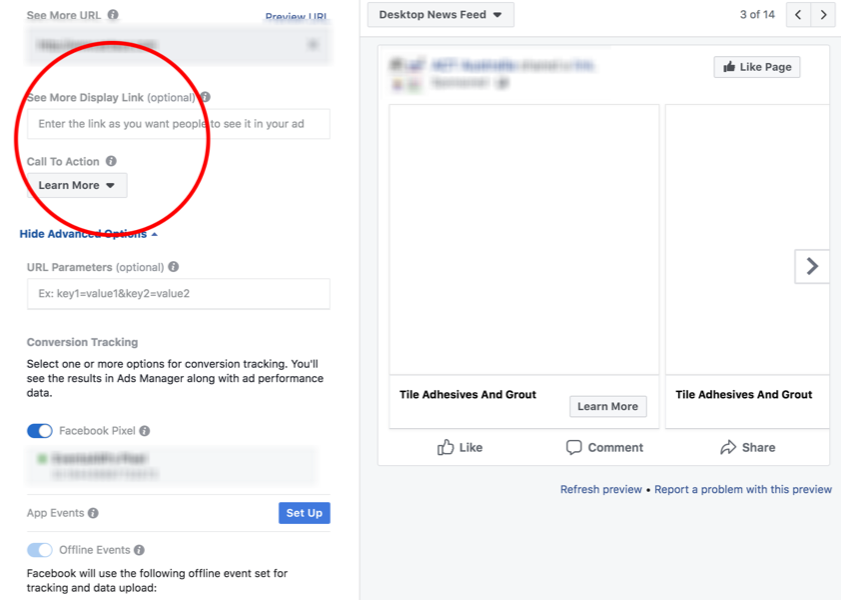
Add the URL that you want people to see in your ad, such as a specific landing page on your website related to the ad. Add call to actions to your ad.
Step 11: Click Confirm once you are ready to run your ad.

If you’re looking to improve your online presence but don’t know where to start, contact us today to see how we can help your business grow and succeed online.


